
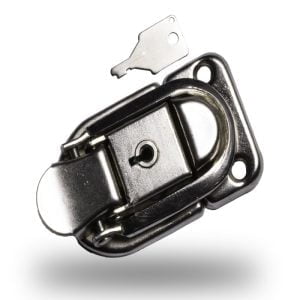
 Knowing how to install a toggle latch correctly is the difference between a secure, long-lasting fastening solution and one that fails under load. Whether you are fitting toggle latches to toolboxes, enclosures, flight cases, or industrial panels, proper installation ensures the latch performs as designed — delivering reliable clamping force every time.
At Venture Products, we have been manufacturing precision metal pressings in South Africa since 1993. Our range includes over 600 products, and our toggle latches are among the most widely used industrial hardware items we produce. In this guide, we walk you through the complete toggle latch installation process, from preparation to final testing, with practical tips for South African conditions and materials.
If you are still deciding which latch suits your application, read our guide on how to choose the right toggle latch for industrial applications before starting. For a deeper understanding of load ratings and material specifications, see our post on toggle latches: load strength, materials, safety.
Tools and Materials You Will Need
Before you begin, gather the following tools and materials. Having everything on hand prevents interruptions and ensures clean, accurate work.
Essential Tools
- Electric drill or cordless drill — for drilling pilot holes and clearance holes
- Drill bits — HSS (high-speed steel) bits for metal; standard bits for wood and fibreglass. Match the bit diameter to your fastener size (see metric sizes below)
- Screwdriver — Phillips or flat-head, depending on your fastener. A driver bit for your drill speeds things up on multiple installations
- Pencil or scriber — for marking hole positions on the mounting surface
- Tape measure or steel rule — metric, for precise positioning
- Centre punch and hammer — essential when drilling into metal to prevent the bit from wandering
- Spirit level (optional but recommended) — for ensuring the latch body and striker are level relative to each other
- Deburring tool or file — to clean up drilled holes in metal
Materials and Fasteners
- Toggle latch — from the Venture Products range
- Matching striker (catch plate) — each Venture Products latch has a corresponding striker. Always use the correct pairing
- Fasteners — screws, bolts, or rivets appropriate to your mounting method and material (metric sizes — see section below)
- Backing plate or washer plate (if required) — for thin or soft materials
- Thread-locking compound (optional) — recommended for applications subject to vibration
- Corrosion inhibitor or primer (if needed) — particularly for outdoor or coastal installations
Step 1: Surface Preparation
Proper surface preparation is the foundation of a secure toggle latch installation. Rushing this step leads to misalignment and weak fixings.
Clean the Mounting Area
Remove dust, oil, grease, paint flakes, or rust from the area where both the latch body and striker will be mounted. On metal surfaces, wipe down with a degreaser. On painted surfaces, ensure the paint is firmly adhered — loose paint under a mounting flange will compress over time, loosening the fasteners.
Check the Surface is Flat
Toggle latches require a flat mounting surface. If the panel is warped or has a raised weld bead, flatten or grind the area before proceeding. A latch body mounted on an uneven surface will not align correctly with the striker, and clamping force will be uneven.
Assess Panel Thickness
Measure the thickness of the panel or lid where you are mounting. This determines:
- Whether you need through-bolts or self-tapping screws
- Whether a backing plate is required (more on this below)
- The minimum fastener length
For panels thinner than 1.5 mm, a backing plate on the reverse side is strongly recommended to distribute load and prevent pull-through.
Step 2: Marking Out and Positioning
Accurate marking is the most important step in the entire process. A misaligned toggle latch will not close properly, will wear unevenly, and may fail prematurely.
Position the Latch Body
- Hold the latch body in its intended position on the mounting surface.
- Ensure it is square and level. Use a spirit level or measure from a reference edge.
- Using a sharp pencil or scriber, mark the centre of each mounting hole through the latch body’s mounting flanges.
- Double-check the marks against the latch body before moving on.
Position the Striker
- Close the toggle latch lever onto the striker while holding both pieces in position. This is the most reliable way to ensure correct alignment.
- With the latch engaged, mark the striker’s mounting holes.
- Alternatively, measure the distance between the latch body’s mounting holes and the striker’s mounting holes using the latch as a template. Record the centre-to-centre distance.
Pro tip: On enclosures or boxes where the latch bridges a lid and body, close the lid fully before marking the striker position. Any gap between lid and body will throw off the alignment.
Centre Punch the Marks
For metal surfaces, use a centre punch at each marked point. Strike it firmly with a hammer to create a small dimple. This dimple guides the drill bit and prevents it from skating across the surface — a common cause of misaligned holes.
For wood or fibreglass, a firm press with an awl or nail achieves the same result.
Step 3: Drilling
Selecting the Right Drill Bit Size
Use metric drill bits sized to your fasteners:
| Fastener | Pilot Hole (Metal) | Clearance Hole |
|---|---|---|
| M3 screw | 2.5 mm | 3.2 mm |
| M4 screw | 3.3 mm | 4.2 mm |
| M5 screw | 4.2 mm | 5.3 mm |
| M6 bolt | 5.0 mm | 6.5 mm |
For self-tapping screws into metal, the pilot hole should be slightly smaller than the screw’s core diameter. For through-bolts, drill a clearance hole that allows the bolt shank to pass through freely.
Drilling Technique
- Metal surfaces: Use a slow to moderate drill speed. Apply cutting oil or a drop of light machine oil to extend bit life. Drill perpendicular to the surface — an angled hole will prevent the fastener from seating flush.
- Wood surfaces: Use a standard twist bit or brad-point bit. Drill pilot holes to prevent splitting, especially near edges.
- Fibreglass/composite: Use a sharp HSS or carbide bit. Back the material with scrap wood to prevent breakout on the exit side. Do not use excessive pressure.
- Aluminium: HSS bits work well. Use a moderate speed and clear swarf frequently to prevent clogging.
Deburr the Holes
After drilling, remove burrs from both sides of each hole using a deburring tool, countersink bit, or file. Burrs prevent the latch flanges from sitting flat and can cut into protective finishes, inviting corrosion.
Step 4: Mounting the Latch Body
With holes drilled and deburred, mount the latch body first.
- Place the latch body over the drilled holes.
- Insert fasteners through the mounting holes.
- Tighten evenly — do not fully tighten one fastener before starting the others. Snug each fastener to about 70% torque first, then do a final tightening pass. This prevents the latch body from shifting as you work.
- Check that the latch body sits flat against the surface with no gaps or rocking.
Choosing Your Mounting Method
There are three common methods for mounting toggle latches. The right choice depends on your material, load requirements, and whether you need the installation to be removable.
Surface Mount with Self-Tapping Screws
Best for: Sheet metal (1.0 mm–3.0 mm), wood, fibreglass panels
This is the most common method for general applications. Self-tapping screws cut their own thread into the base material, eliminating the need for nuts on the reverse side.
- Use screws with a metric thread pitch suited to the material thickness
- Always drill pilot holes — driving self-tapping screws without pilot holes distorts thin metal and can crack fibreglass
- For sheet metal thinner than 1.0 mm, consider through-bolts instead
Through-Bolt Mounting
Best for: Heavy-duty applications, thin panels, vibration-prone environments, critical enclosures
Through-bolts with nuts (and preferably washers) on the reverse side provide the strongest and most reliable fixing. The bolt passes completely through the panel, and a nut and washer secure it from behind.
- Use a flat washer on both sides to distribute load
- Use a lock nut (nyloc) or spring washer in vibration-prone applications
- This method requires access to both sides of the panel
Rivet Mounting
Best for: Permanent installations, thin sheet metal, situations where reverse access is limited after assembly
Blind rivets (pop rivets) can be installed from one side. They provide a clean, permanent fixing.
- Use aluminium or steel rivets to match the latch and panel material (avoid mixing dissimilar metals — see corrosion section below)
- Rivet diameter should match or slightly exceed the latch mounting hole diameter
- Note: riveted installations are not easily removable for maintenance or replacement
Step 5: Mounting the Striker
The striker (catch plate) is the receiving component that the latch lever hooks onto. Correct striker positioning is critical.
- With the latch body securely mounted, hold the striker in position.
- Close the toggle latch lever onto the striker to verify alignment. The lever should engage smoothly without forcing.
- Mark, centre punch, drill, and mount the striker using the same method as the latch body.
- Tighten fasteners evenly.
Getting the Spacing Right
The distance between the latch body and the striker determines the clamping force. If the striker is too close, the lever will be difficult to close and may over-stress the toggle mechanism. If it is too far, the latch will not generate adequate clamping force and may rattle.
Most Venture Products toggle latches have a small amount of adjustment built in — the striker mounting holes are often slotted to allow fine-tuning of this distance. Use this adjustment range to dial in the correct tension.
Step 6: Alignment Check and Adjustment
Once both components are mounted, perform a thorough alignment check.
- Open and close the latch several times. The lever should travel smoothly through its full range of motion without binding or scraping.
- Check for lateral misalignment. The latch hook should engage the striker squarely — not at an angle. Lateral misalignment causes uneven wear on the hook and striker, reducing service life.
- Test the clamping force. When closed, the latch should hold firmly. There should be no play or rattling. If the fit is too loose or too tight, adjust the striker position using the slotted holes.
- Verify the latch sits flat. The lever should lie flush against the latch body when closed. If it pops up or sits proud, the striker may be too far away.
If adjustment is needed, loosen the striker fasteners slightly, reposition, and re-tighten. Do not enlarge the holes — this weakens the fixing.
Step 7: Final Testing
Before putting the assembly into service:
- Load test the latch by applying force in the direction it will experience during use. Open and close it 20–30 times to confirm consistent operation.
- Check all fasteners for tightness.
- Inspect the mounting surfaces for any signs of deformation or cracking around the fixing holes.
- Confirm the latch locks positively in the over-centre position. A properly installed toggle latch should stay closed without any tendency to spring open.
Common Installation Mistakes and How to Avoid Them
Even experienced fitters make these errors. Knowing what to watch for saves time and prevents rework.
1. Misalignment Between Latch and Striker
The problem: The latch does not engage smoothly, binds, or does not generate full clamping force.
The fix: Always use the latch itself as a template when positioning the striker. Close the latch onto the striker before marking and drilling. Never rely solely on measurements from a drawing unless you have verified them against the actual components.
2. Using the Wrong Screw Size or Type
The problem: Screws too small for the mounting holes allow the latch to shift under load. Screws too large do not fit through the mounting holes or crack the surrounding material.
The fix: Match the fastener to the latch’s mounting hole diameter. Venture Products toggle latches are designed for standard metric fasteners. Check the technical information page or contact us for specific recommendations.
3. Skipping Pilot Holes
The problem: Driving screws directly into metal without pilot holes causes the sheet to dimple, distort, or crack. The screw may not seat properly, and the latch will not sit flat.
The fix: Always drill pilot holes, even in soft materials. It takes 30 seconds per hole and prevents problems that take much longer to fix.
4. Ignoring Panel Thickness
The problem: Self-tapping screws in thin sheet metal (under 1.0 mm) strip out easily, especially under vibration. The latch works loose over time.
The fix: For thin panels, use through-bolts with backing washers or a backing plate. For panels under 0.8 mm, seriously consider whether a backing plate or reinforcement is necessary.
5. Over-Tightening Fasteners
The problem: Over-torquing screws into thin metal or fibreglass crushes the panel material, creating a weak point. In extreme cases, the mounting flange deforms.
The fix: Tighten to snug plus a quarter turn. If using through-bolts, use a torque wrench if available. The fastener should be firm without distorting the panel surface.
6. Mixing Dissimilar Metals
The problem: Using steel rivets with a stainless steel latch, or aluminium fasteners with a zinc-plated latch, creates galvanic corrosion — especially in humid or coastal environments.
The fix: Match fastener materials to the latch finish. For Venture Products latches in stainless steel, use stainless steel fasteners. For zinc-plated latches, use zinc-plated or galvanised fasteners. Read more about material selection in our post on why stainless steel is the material of choice for industrial fasteners.
Mounting on Different Materials: Tips by Substrate
Steel
- Centre punch before drilling — essential to prevent bit wander on hardened surfaces
- Use HSS or cobalt drill bits
- Apply cutting fluid for cleaner holes and longer bit life
- Self-tapping screws work well in steel from 1.0 mm to 3.0 mm thick
- For heavier gauge steel (over 3.0 mm), consider tapping threads (M4 or M5) and using machine screws
Aluminium
- Aluminium is softer and more prone to stripping than steel — do not over-tighten
- Use a slightly smaller pilot hole than you would for steel, as aluminium grips screws less aggressively
- Avoid steel fasteners in direct contact with aluminium in wet environments (galvanic corrosion risk). Use stainless steel or aluminium fasteners
- Aluminium swarf is sticky — clear chips frequently during drilling
Wood and Plywood
- Drill pilot holes to prevent splitting, especially within 25 mm of an edge
- Use wood screws or self-tapping screws with a coarse thread
- For softwood or thin plywood, add a backing plate or large washer on the reverse to distribute load
- Seal drilled holes with primer or wood sealer if the installation will be exposed to moisture
Fibreglass and Composite Panels
- Always back with scrap material to prevent exit-side breakout
- Use sharp bits and moderate speed — excessive heat delaminates fibreglass
- Through-bolt mounting with large-area washers is strongly recommended to prevent crushing
- Seal all drilled holes to prevent moisture ingress into the laminate core
When to Use Backing Plates or Reinforcement
A backing plate is a flat piece of metal (typically 1.5 mm–3.0 mm steel or aluminium) placed on the reverse side of the panel behind the latch or striker mounting area. It serves two purposes:
- Load distribution — spreads the clamping force over a larger area, preventing localised stress and pull-through
- Panel reinforcement — stiffens the panel in the mounting area, reducing flexing that can loosen fasteners
Use a backing plate when:
- The panel is thinner than 1.5 mm
- The panel material is soft (aluminium, fibreglass, thin plywood)
- The application involves significant vibration or repeated opening/closing cycles
- The toggle latch is heavy-duty with a high clamping force rating
- The panel shows any signs of flexing when the latch is engaged
Backing plates should have holes that match the latch’s mounting pattern. Secure them with through-bolts for the best result.
Maintenance After Installation
A correctly installed toggle latch requires minimal maintenance, but regular checks extend its service life significantly.
Lubrication
- Apply a light machine oil or silicone-based lubricant to the pivot points every 6–12 months
- In dusty environments (mining, agriculture, construction), lubricate more frequently — every 3–6 months
- Avoid heavy grease, which attracts dust and grit that accelerate wear
- For food-grade or clean-room applications, use a food-safe lubricant
Inspection Schedule
| Environment | Inspection Interval |
|---|---|
| Indoor, clean | Every 12 months |
| Indoor, industrial | Every 6 months |
| Outdoor, inland | Every 6 months |
| Outdoor, coastal | Every 3 months |
| High-vibration (vehicles, machinery) | Every 3 months or per service schedule |
What to Check
- Fastener tightness — re-torque if any fasteners have loosened
- Latch engagement — the lever should still close firmly without excessive force
- Wear on the hook and striker — visible wear grooves or thinning indicate the components are nearing end of life
- Corrosion — surface rust on zinc-plated latches can be treated early with a rust converter and touch-up paint. If corrosion is advanced, replace the latch
- Pivot action — the lever should move smoothly. Stiffness or grinding indicates lack of lubrication or internal corrosion
Fastener Tightening
Vibration is the main enemy of toggle latch fasteners. In high-vibration applications:
- Use nyloc lock nuts on through-bolts
- Apply medium-strength thread-locking compound (e.g., Loctite 243 or equivalent)
- Check and re-tighten fasteners at each inspection interval
South Africa-Specific Tips
Corrosion Prevention by Climate Zone
South Africa’s diverse climate means corrosion risk varies significantly by region.
Highveld (Gauteng, Free State, Mpumalanga interior): Relatively dry with low humidity. Standard zinc yellow or zinc white finishes from Venture Products provide adequate protection for most applications. Outdoor installations should still be inspected annually.
Coastal regions (KwaZulu-Natal, Eastern Cape, Western Cape coast): Salt-laden air accelerates corrosion dramatically. For coastal installations:
- Choose stainless steel toggle latches or stainless steel finished components
- Use stainless steel fasteners exclusively
- Apply a marine-grade anti-corrosion spray after installation
- Inspect every 3 months and treat any early corrosion immediately
- Read our detailed post on why stainless steel is the material of choice
Western Cape (winter rainfall): Prolonged wet winters combined with wind-driven rain create persistent moisture exposure. Ensure drainage around enclosed latch installations and avoid designs that trap standing water around mounting points.
Bushveld and Lowveld (Limpopo, northern KwaZulu-Natal): High humidity and temperature cycling cause condensation. Nickel-finished latches offer good corrosion resistance in these environments. Ensure ventilation in enclosed applications to reduce moisture buildup.
Metric Fastener Sizes
All Venture Products toggle latches are designed around metric specifications — there is no need to source imperial fasteners. Standard metric fasteners are readily available from hardware suppliers across South Africa.
Common sizes for toggle latch installations:
- M3 x 8 mm to M3 x 16 mm — smaller latches, light-duty applications
- M4 x 10 mm to M4 x 20 mm — medium latches, general industrial use
- M5 x 12 mm to M5 x 25 mm — larger latches, heavy-duty applications
- M6 x 16 mm to M6 x 30 mm — heavy-duty latches on thick panels
Always specify the correct head type (pan head, countersunk, hex) based on clearance requirements and the latch design.
Available Finishes
Venture Products toggle latches are available in the following finishes, each suited to different environments:
- Zinc yellow — good general-purpose corrosion resistance, distinctive gold appearance
- Zinc white — clean silver appearance, suitable for indoor and mild outdoor use
- Nickel — decorative and corrosion-resistant, good for humid environments
- Stainless steel — maximum corrosion resistance, ideal for coastal, marine, and food-processing applications
Frequently Asked Questions
Can I install a toggle latch without drilling?
In some cases, yes. If the mounting surface already has threaded inserts, weld nuts, or pre-drilled holes in the correct pattern, you can bolt the latch directly in place. Adhesive mounting is not recommended for toggle latches — the clamping forces and repeated opening/closing cycles will eventually break the bond. For a reliable installation, mechanical fastening (screws, bolts, or rivets) is always preferred.
How do I know if my toggle latch is aligned correctly?
A correctly aligned toggle latch will close smoothly with moderate hand pressure, lock firmly in the over-centre position, and show no tendency to spring open. There should be no lateral play or rattling when closed. If you need to force the lever shut or if it does not sit flat when closed, the striker position needs adjustment.
What size screws should I use for a toggle latch?
This depends on the specific latch model and the mounting hole diameter. Most Venture Products toggle latches use M3, M4, or M5 fasteners. Check the mounting hole diameter on your latch and select a fastener to match. Visit our technical information page for specifications, or contact our team and we can advise on the correct fastener size for your application.
Do I need a backing plate for every installation?
No. Backing plates are necessary when mounting on thin panels (under 1.5 mm), soft materials, or in high-load applications. If your panel is 2.0 mm steel or thicker and the latch is for general-purpose use, direct mounting with through-bolts or self-tapping screws is typically sufficient. When in doubt, a backing plate adds minimal cost and significantly improves reliability.
How often should I maintain a toggle latch?
For indoor, clean environments, an annual inspection and lubrication is sufficient. For outdoor, industrial, or high-vibration applications, inspect every 3–6 months. Coastal installations should be checked quarterly. Regular maintenance is straightforward — it involves tightening fasteners, lubricating pivot points, and checking for wear or corrosion.